How to manage students
1. Provide a license to your students
- Launch the
My Teamsapp at the bottom left
![]()
- Click on the button
Add students
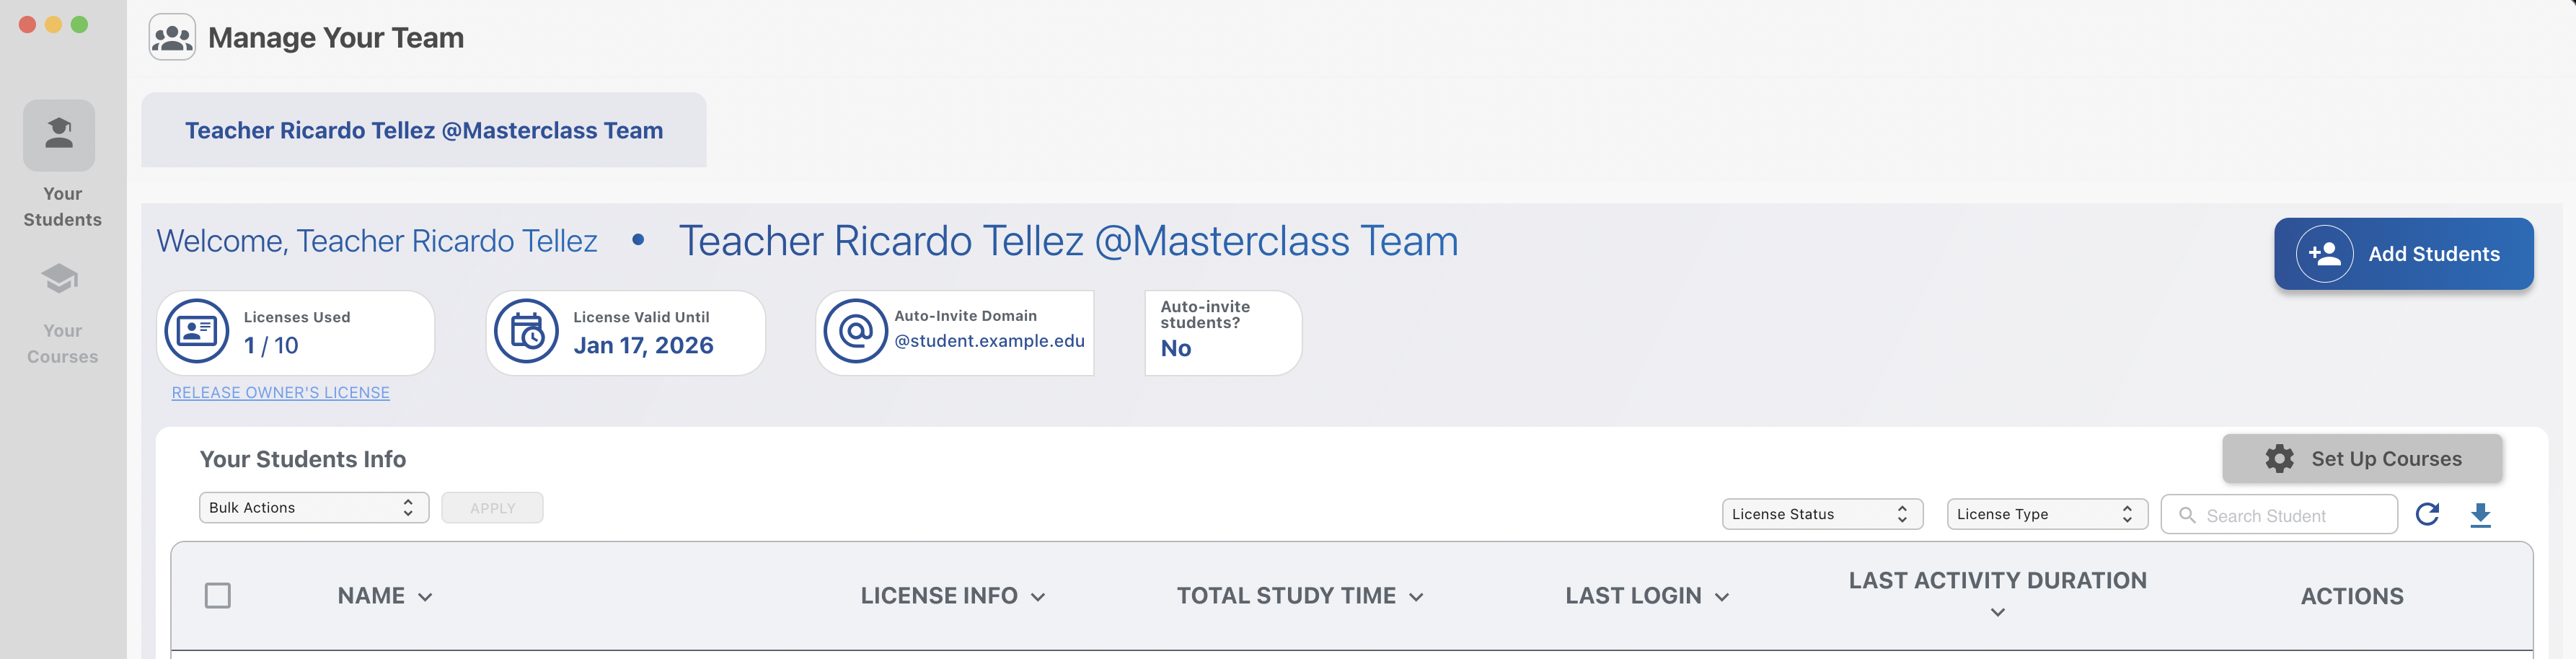
- Copy the green link that appears
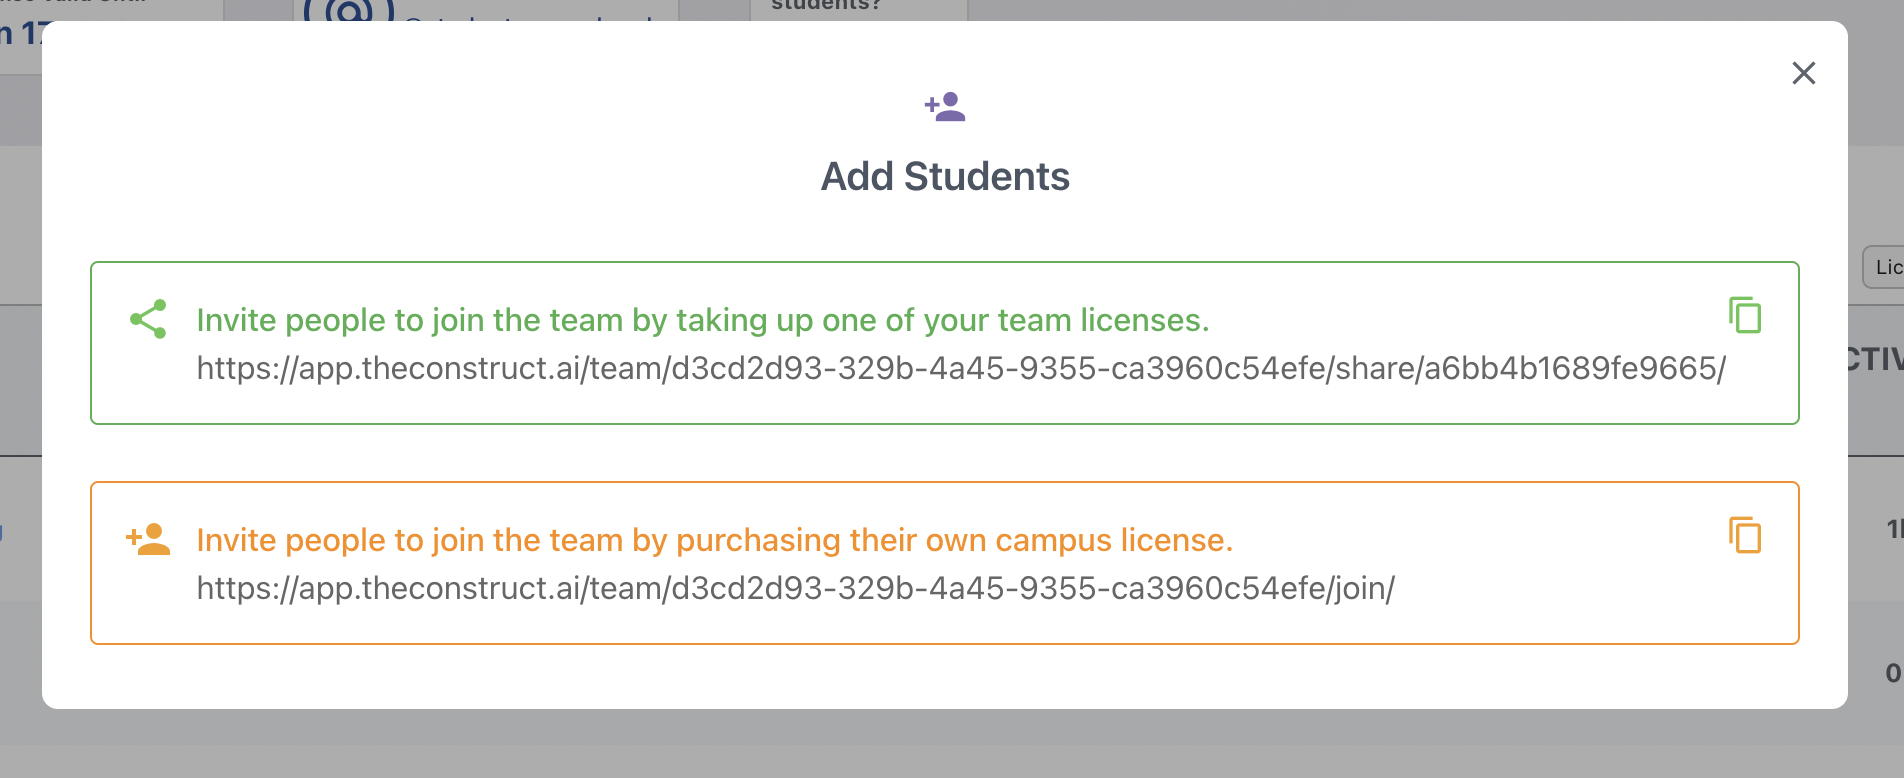
- Share the link with your students
Each student that clicks on the link, will get a license on your team. This will allow you to see their progress and to the students, to access the real lab
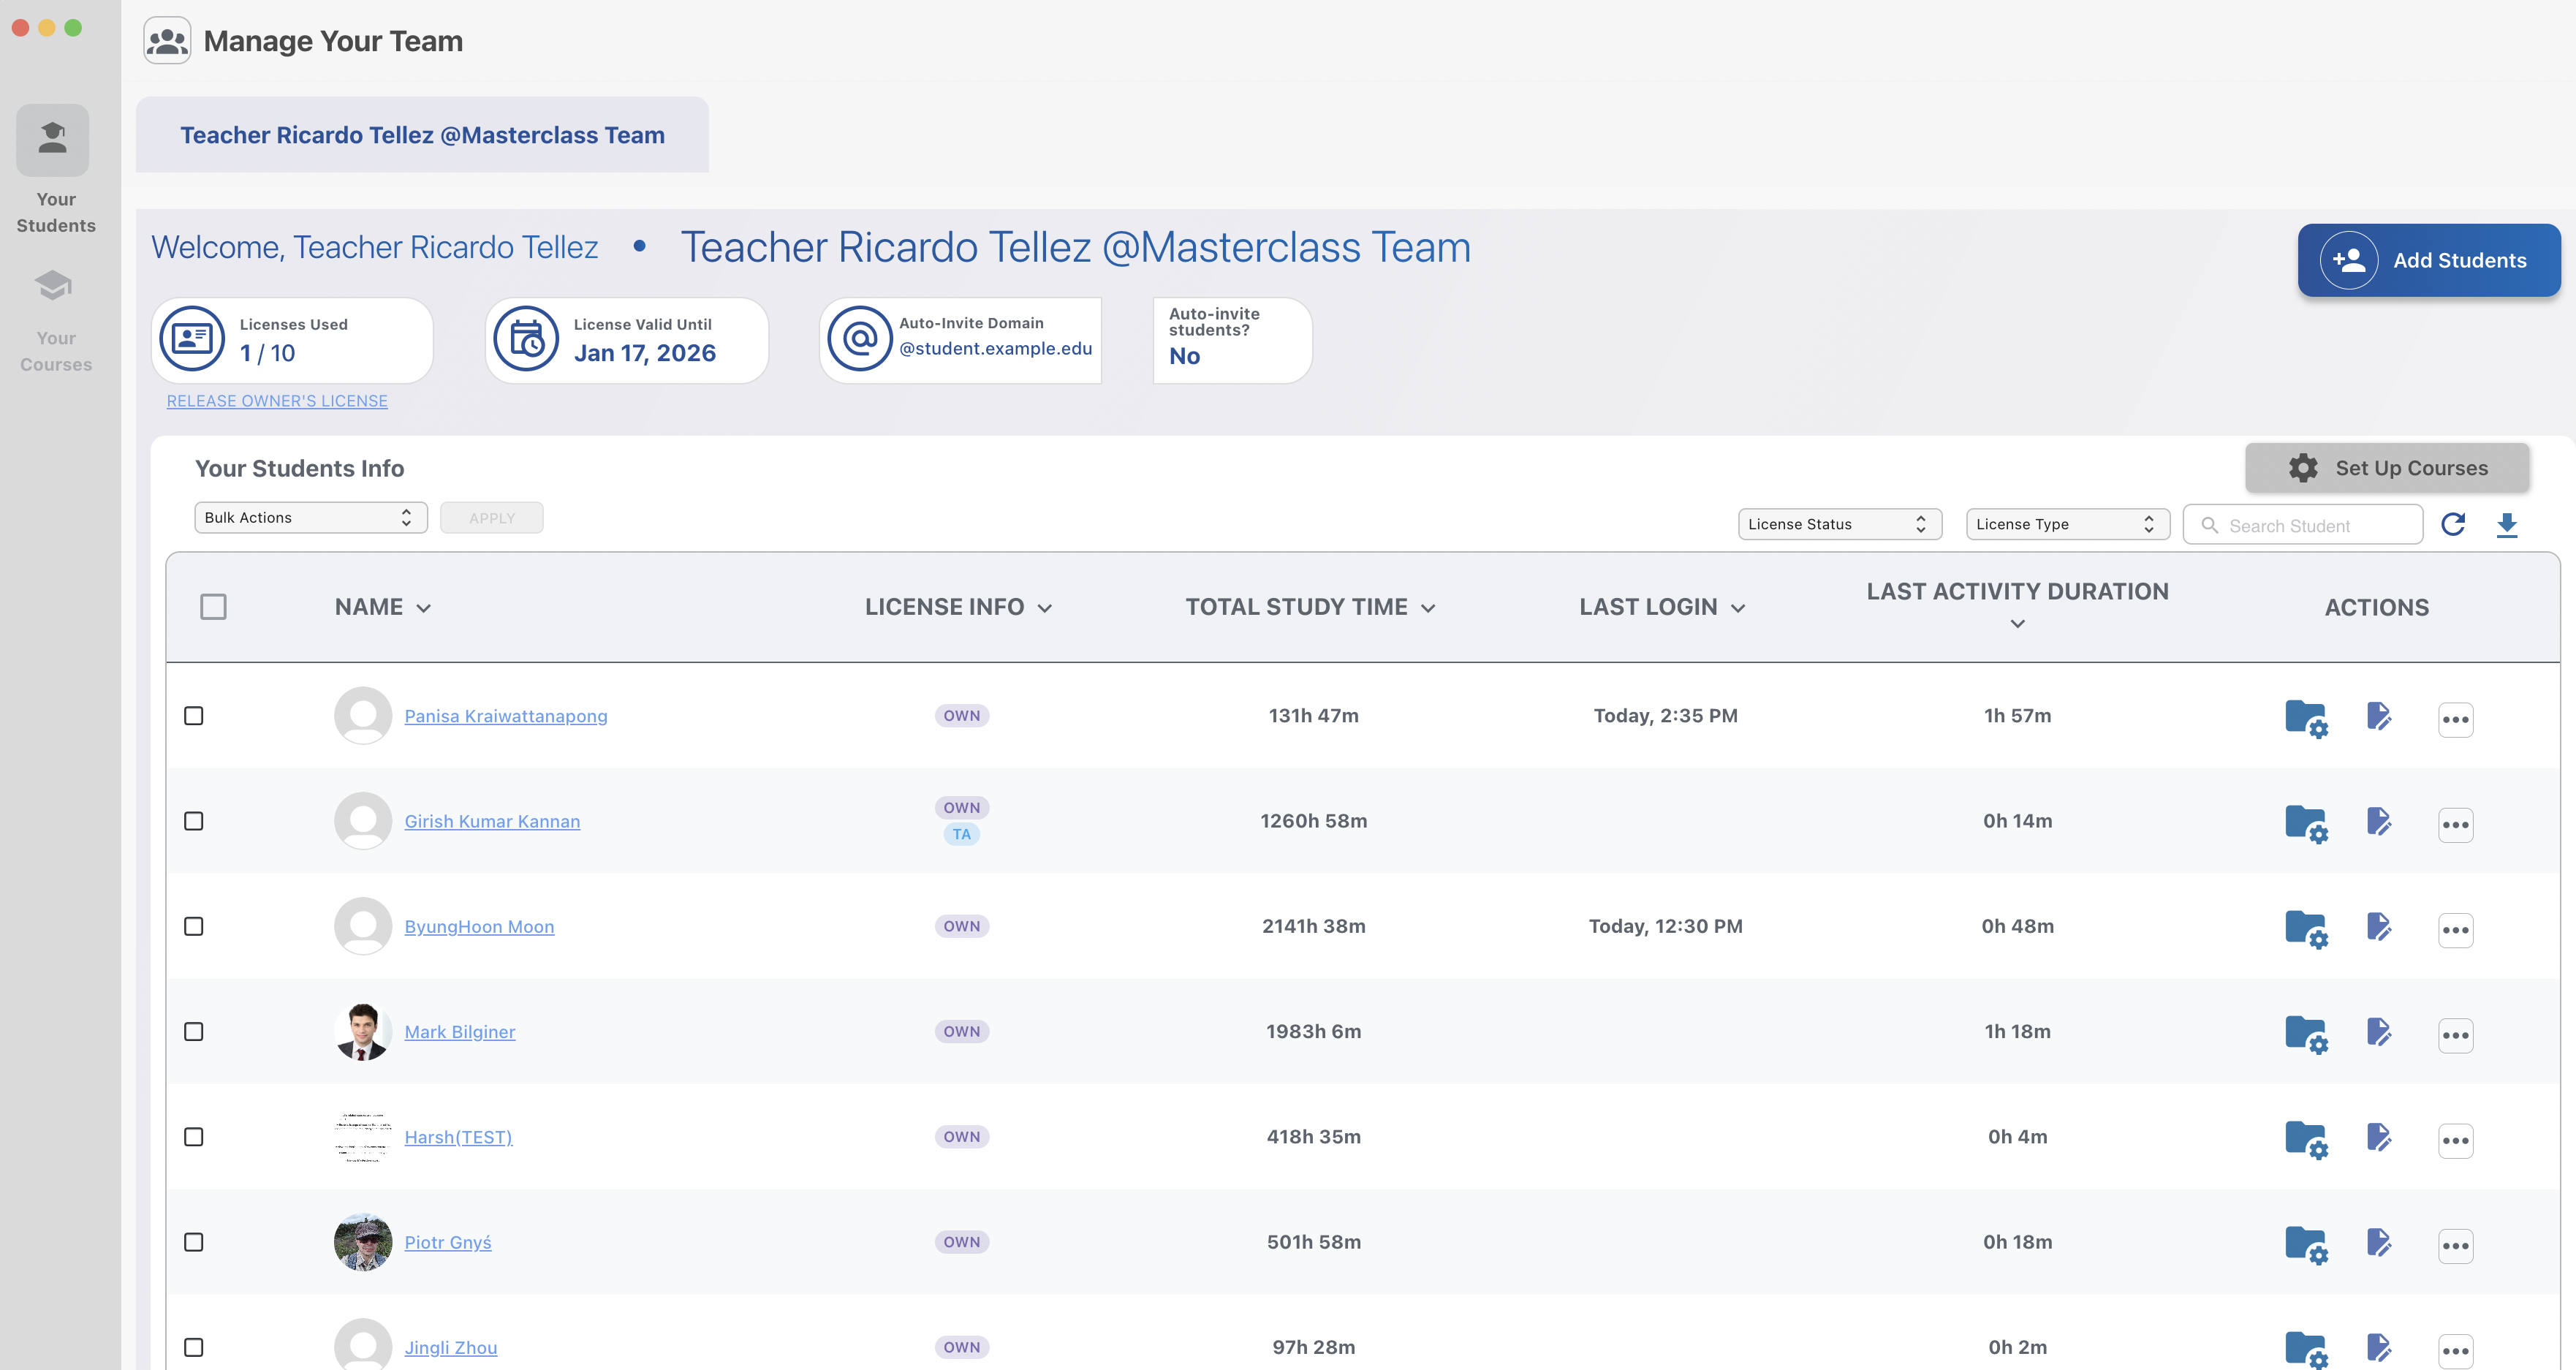
- The student should appear on your list of students below
2. Make students connect to the real lab
You have two options to make the students connect to the robots:
- Make the students do an
sshto the robot that wants to control
Check the Quick start guide to remember how to ssh to the robots.
We do not recommend this option, because students tend to mess the file system of the robots with all their tests
We recommend you to do the second option
- Make the students connect through a rosject
By using this option, the students will never have access to the real robot's file system. They will have access to the robot's topics
Also, students can have several rosjects for different subjects, and connect to the real robots from each one, providing an isolated system at the level of projects.
This method provides complete isolation for the students: from the level of robot and from the level of projects
- Click on the icon at the bottom
![]()
- Click on the
Connectgreen button of the robot you want to connect to
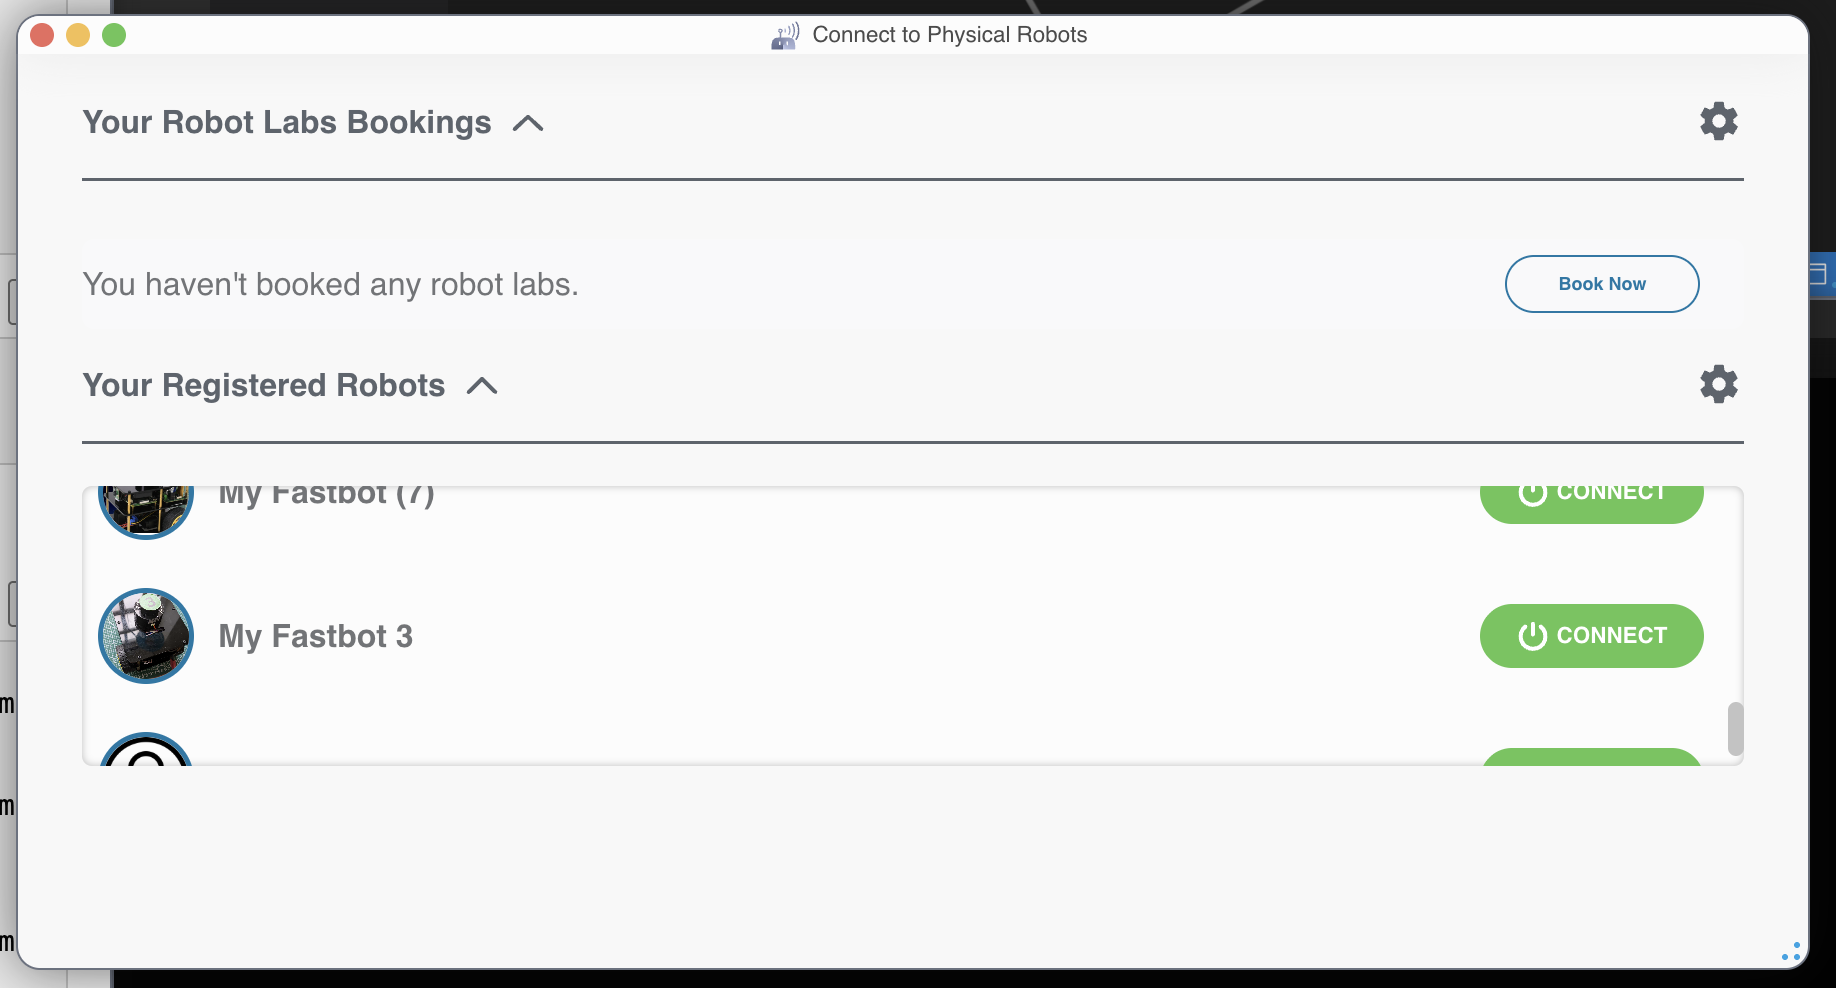
From that point, the terminals will be ROS connected to the robot of the lab. So now, every ROS command executed will be applied over the ROS topics of the robot.