Quick Start Guide
How to unpack the Warehouse Lab and have it working in under 5 minutes
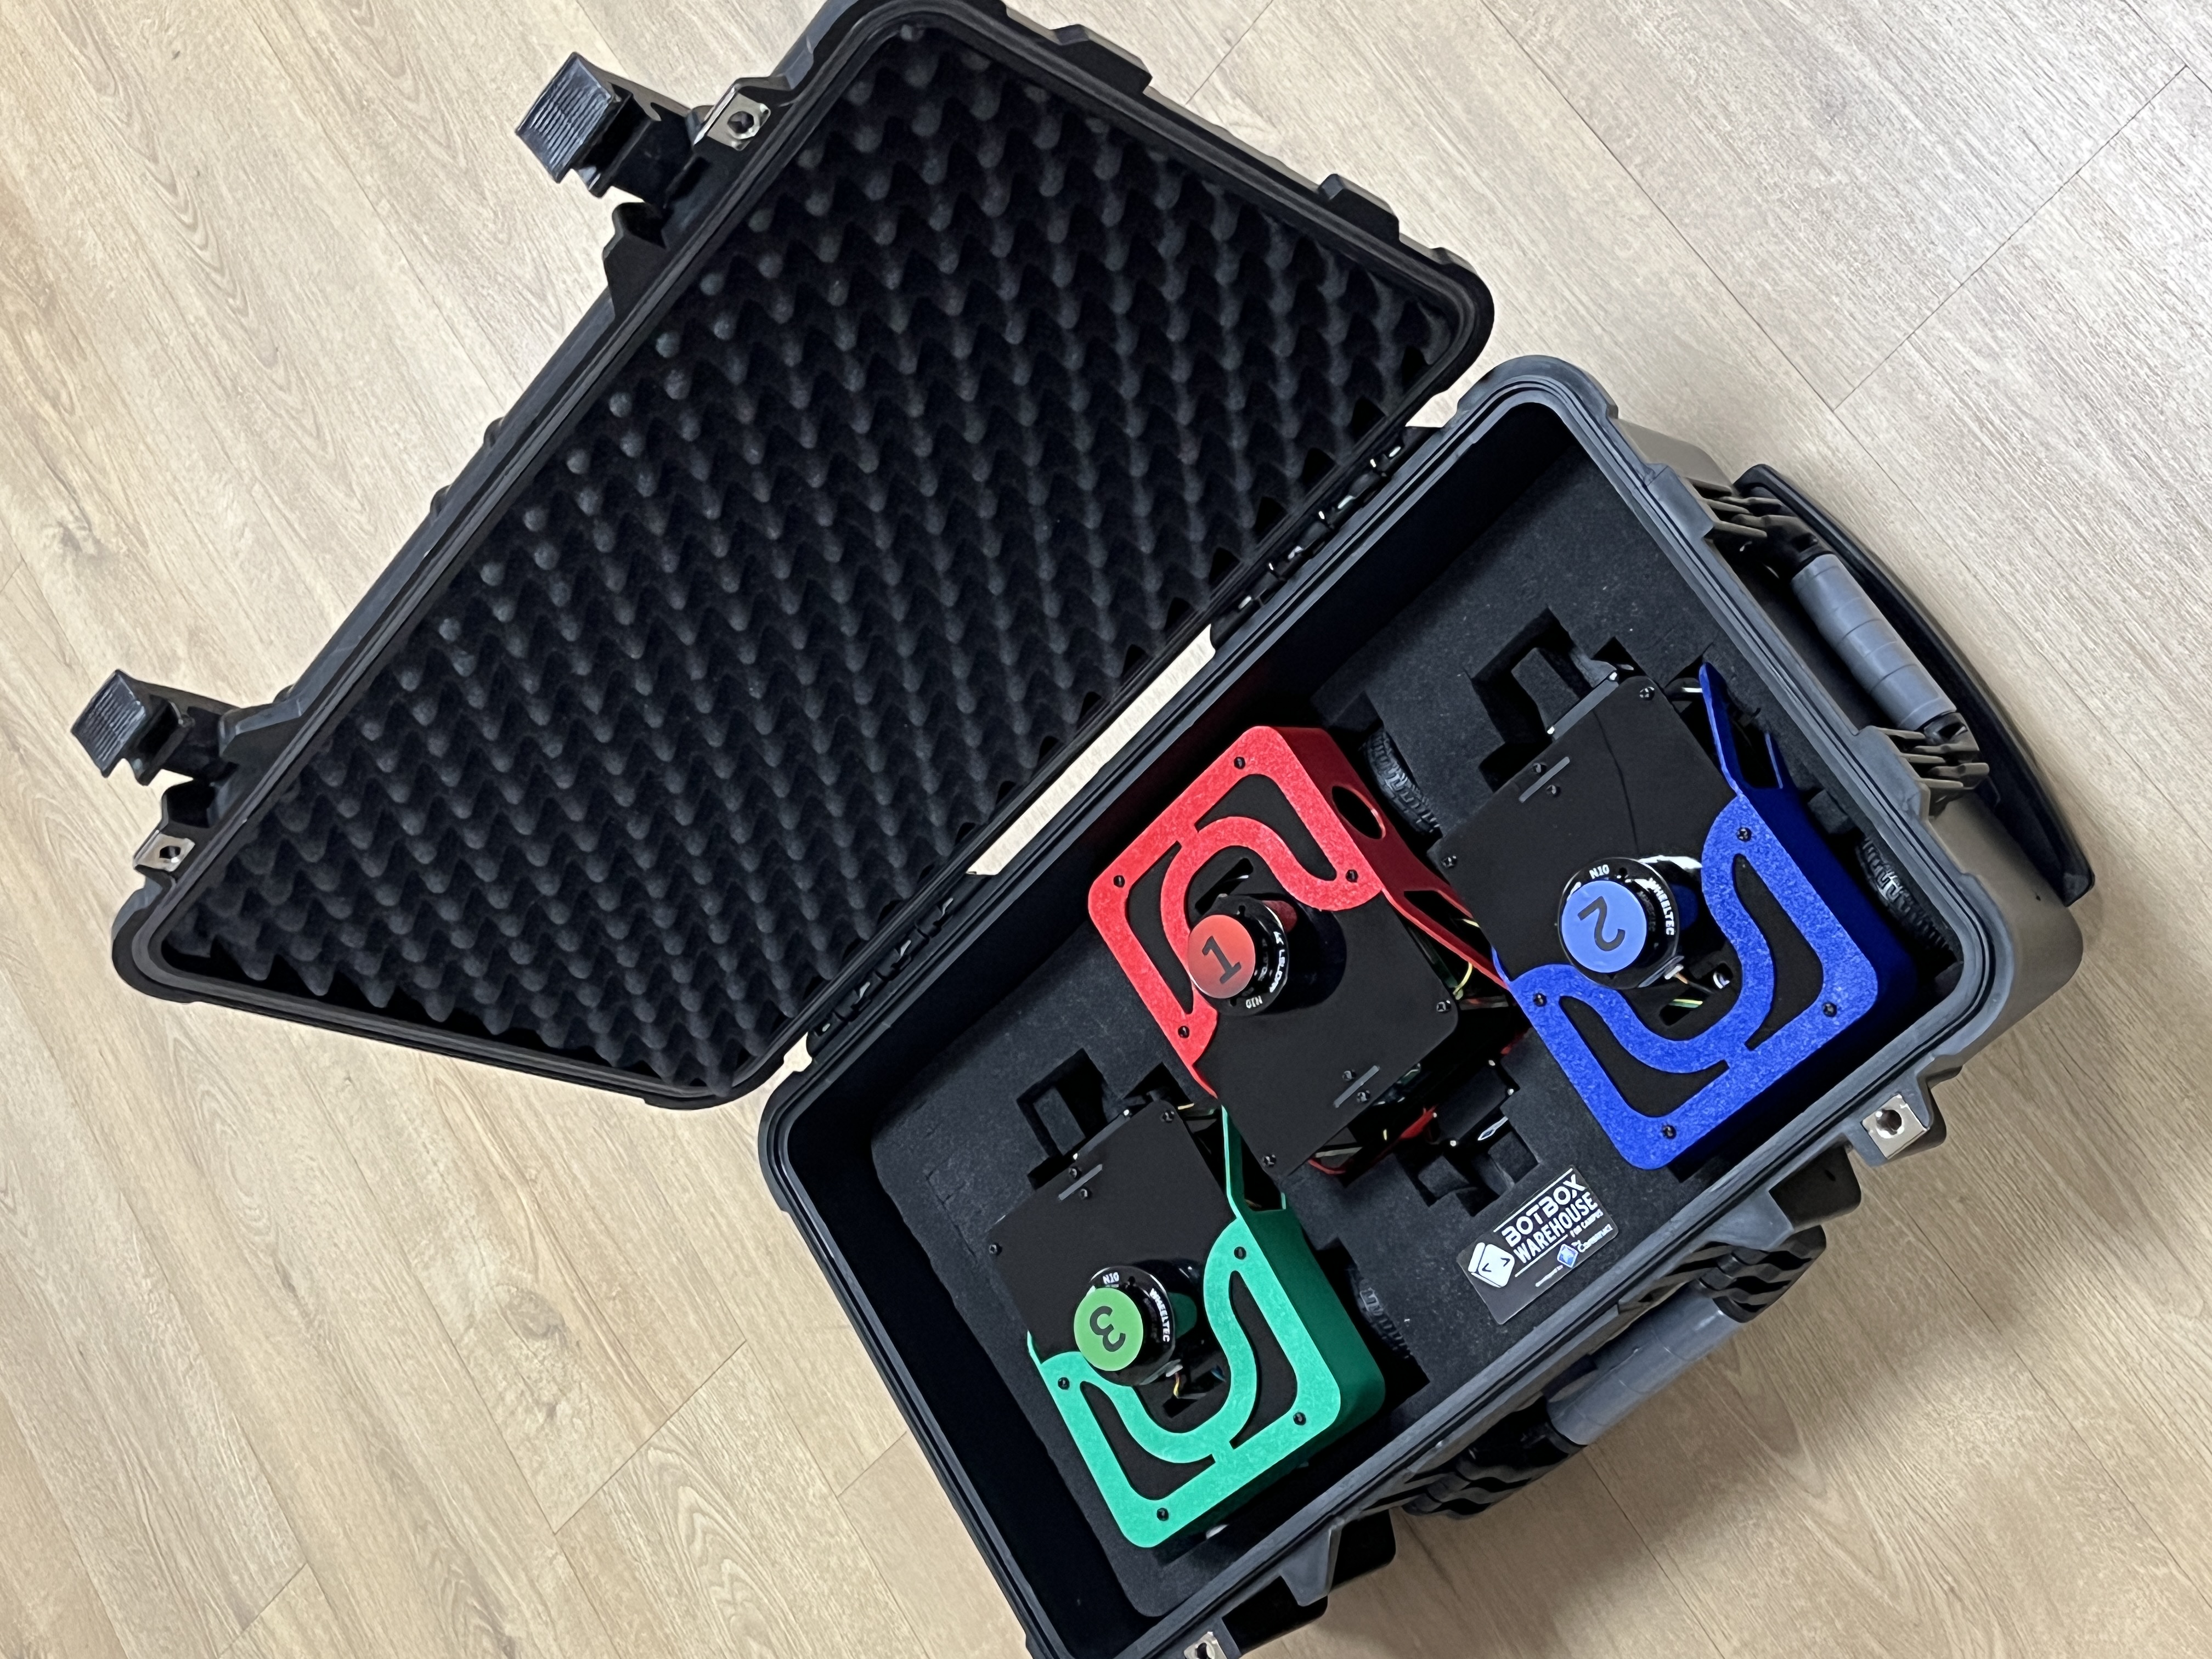
Here it is a list of the things you should have received:
- A strong plastic suitcase with three Fastbot PRO wheeled robots inside ready to switch on
- Six cubes with QR codes
- A floor layout
- Thirty panels with 50 connectors
- A white robot arm with a Raspberry Pi controller and a platform (only in
ULTIMATEversion) - A conveyor belt with a Raspberry Pi controller (only in
ULTIMATEversion) - Two additional floor layouts (only in
ULTIMATEversion) - A set of 6 batteries (received on a separated package) and 3 chargers
- A router (only from
2.0 versionand above) - Several EXTRAS
Check that you received all the material
Setting the lab up
All the robots are ready to work with ROS2 from minute one. But first, you need to connect them to your wifi
After unpacking all the elements, do the following
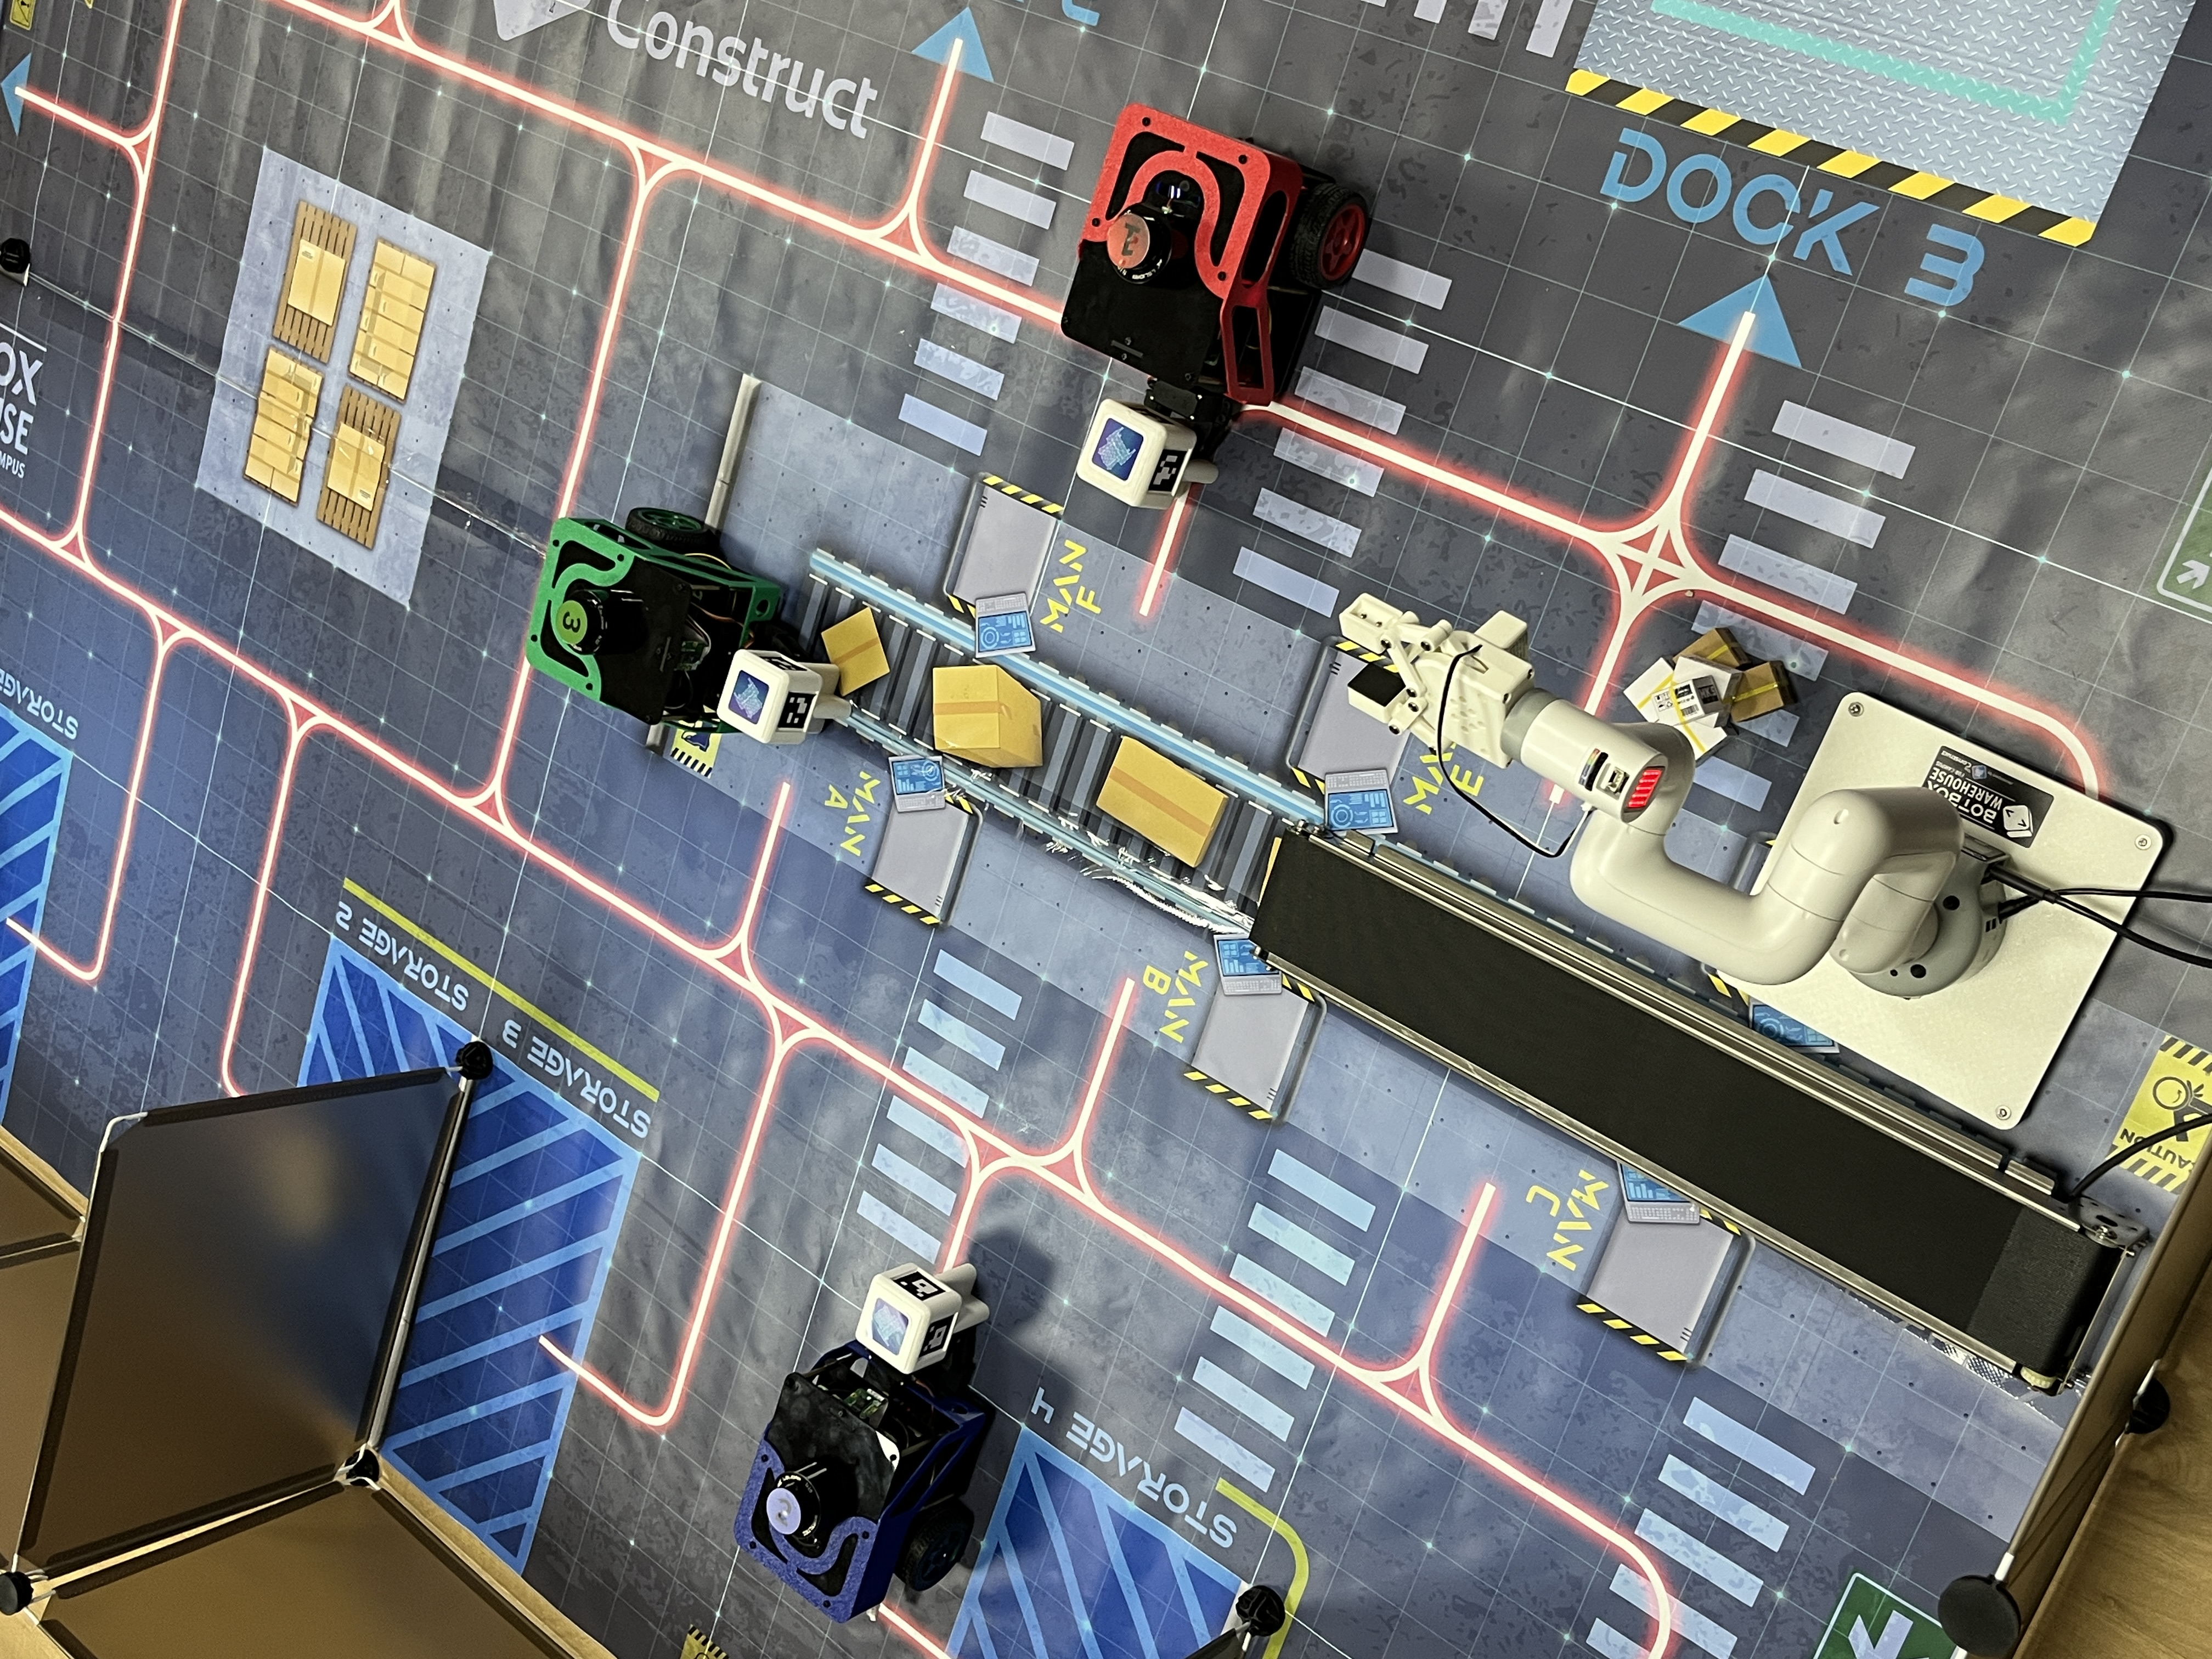
I. Mount the physical lab
You need to get the physical lab mounted. Check this video to learn how to do it (very simple process)
Only if you have version 2.0 and above (the one that includes the router)
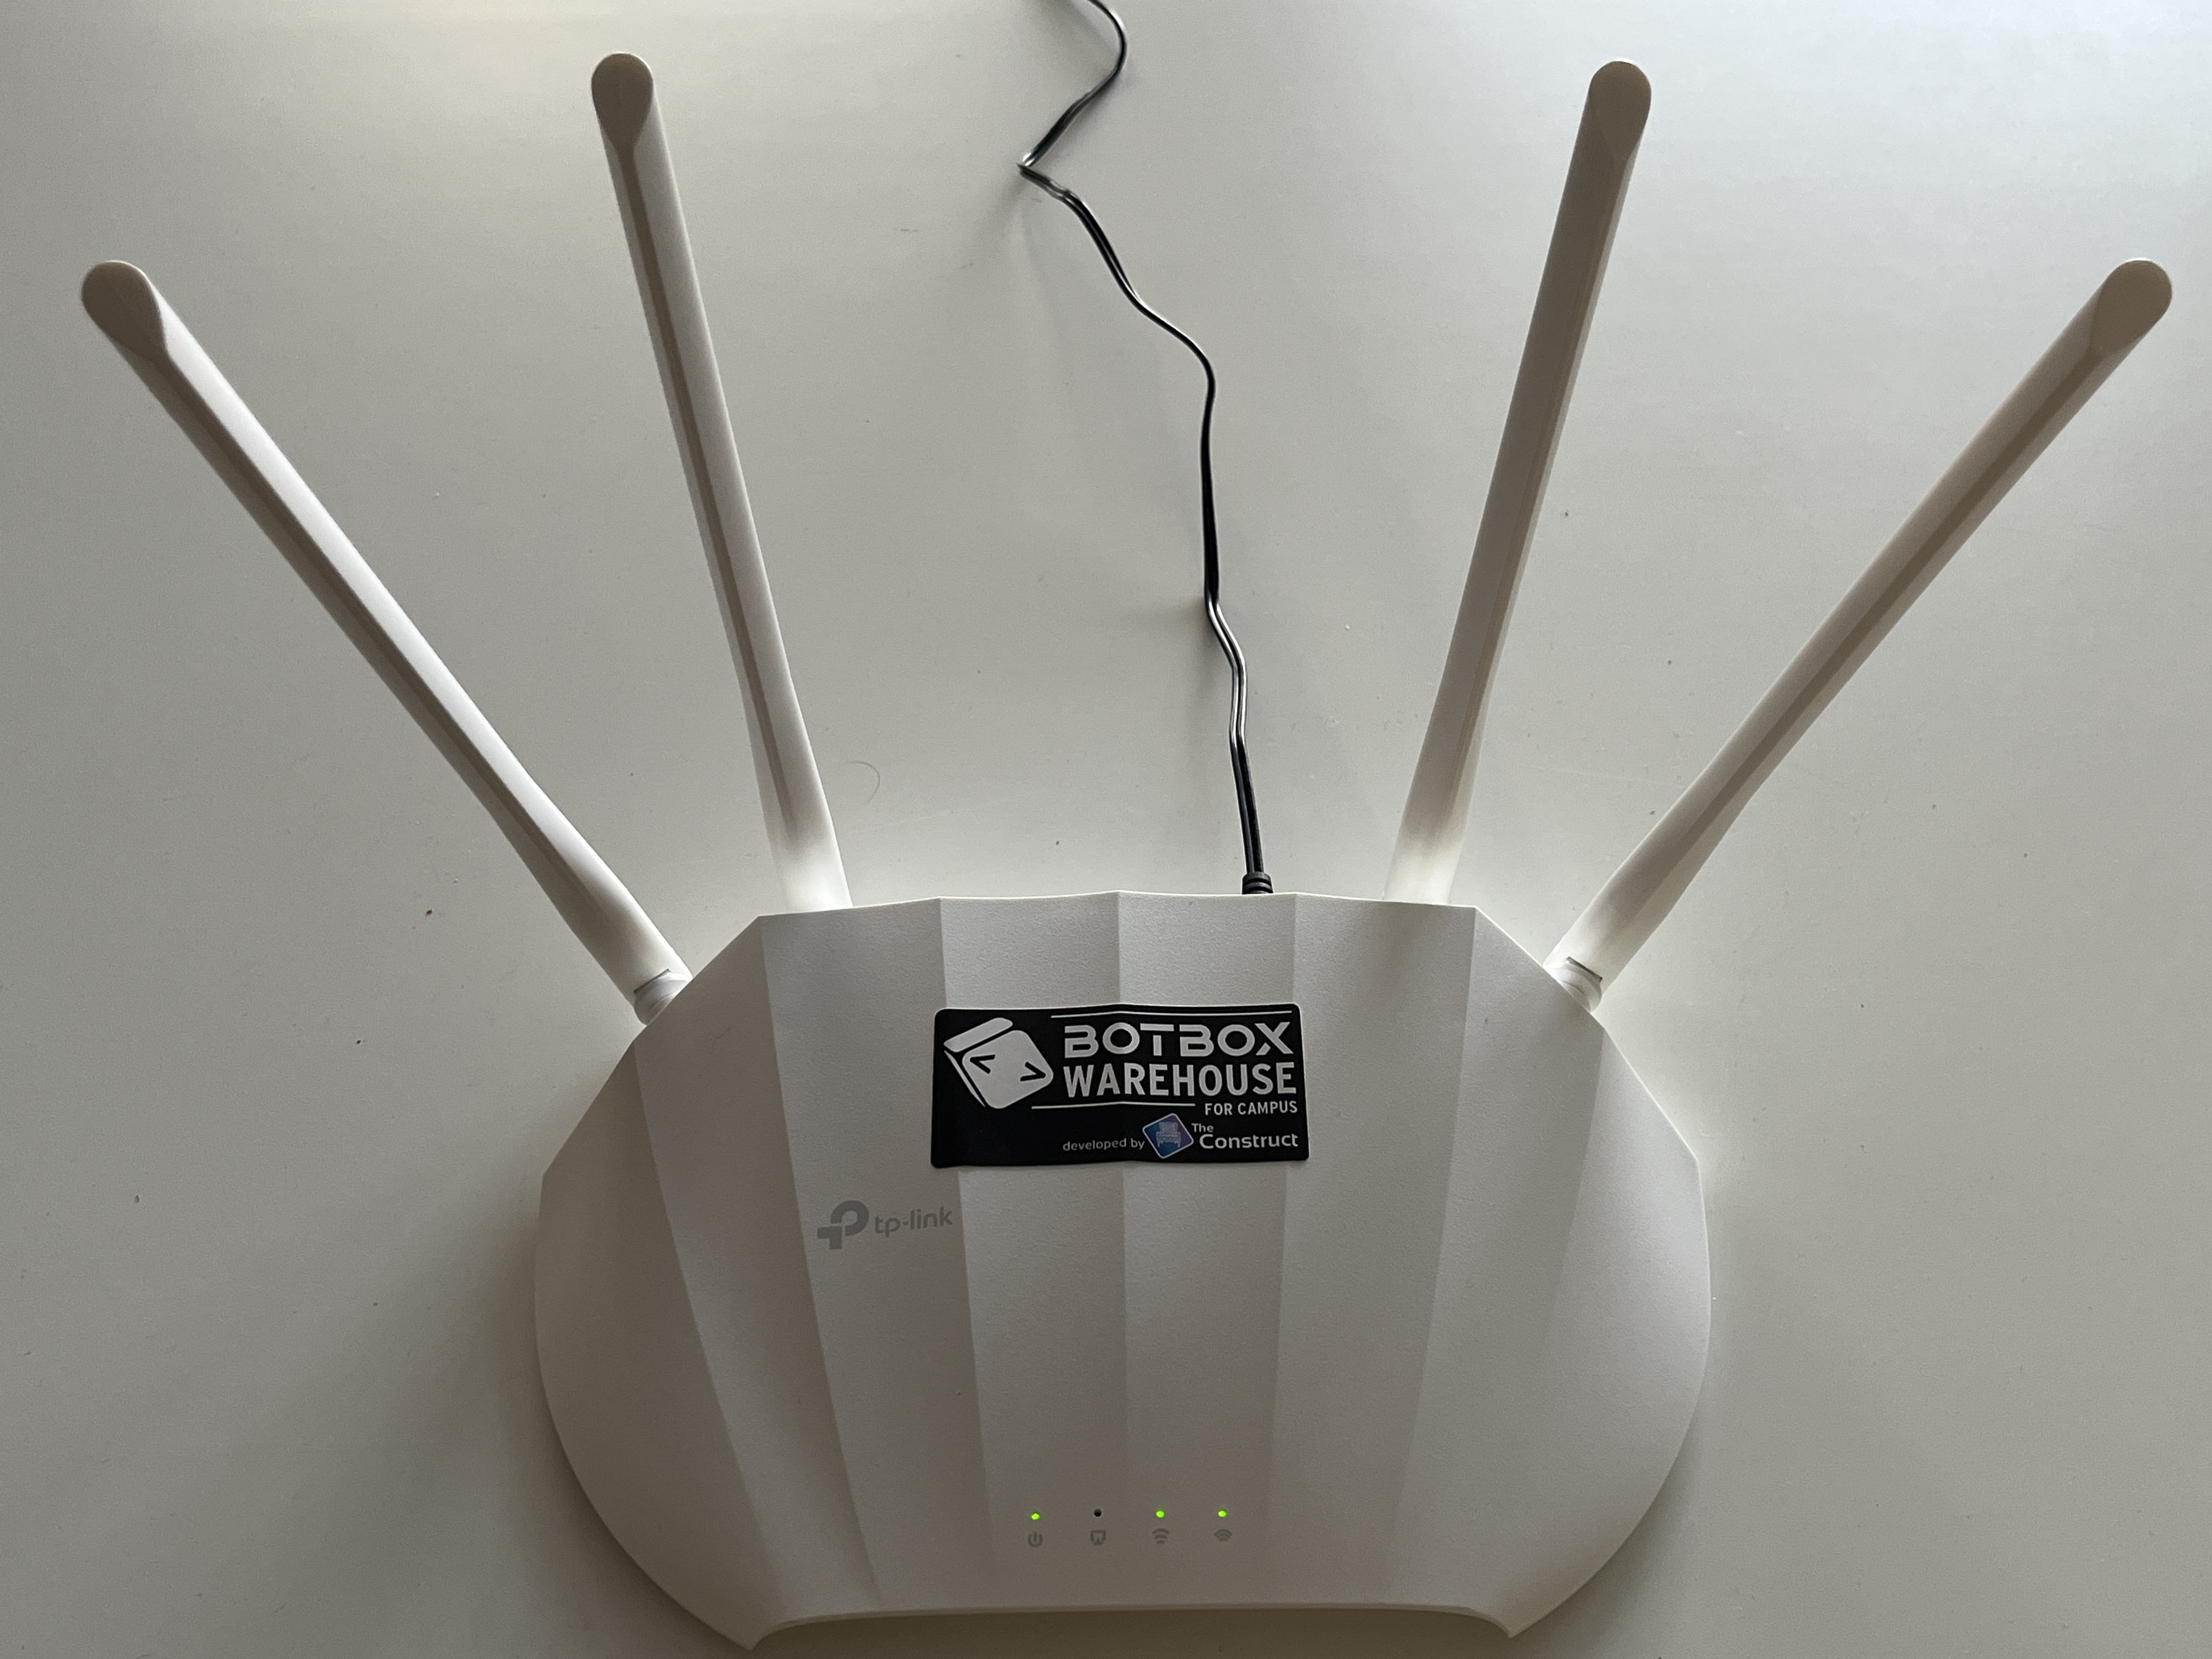
Unpack the included router, power it and switch it on.
The router will generate two wifi networks:
Botbox_Warehouse_LabBotbox_Warehouse_Lab_5GEXT
-> Both networks are open and require no password.
-> The robots will automatically connect to the Botbox_Warehouse_Lab_5GEXT network once switched on
At this point, the router and robots work in the following configuration (ACCESS POINT MODE):
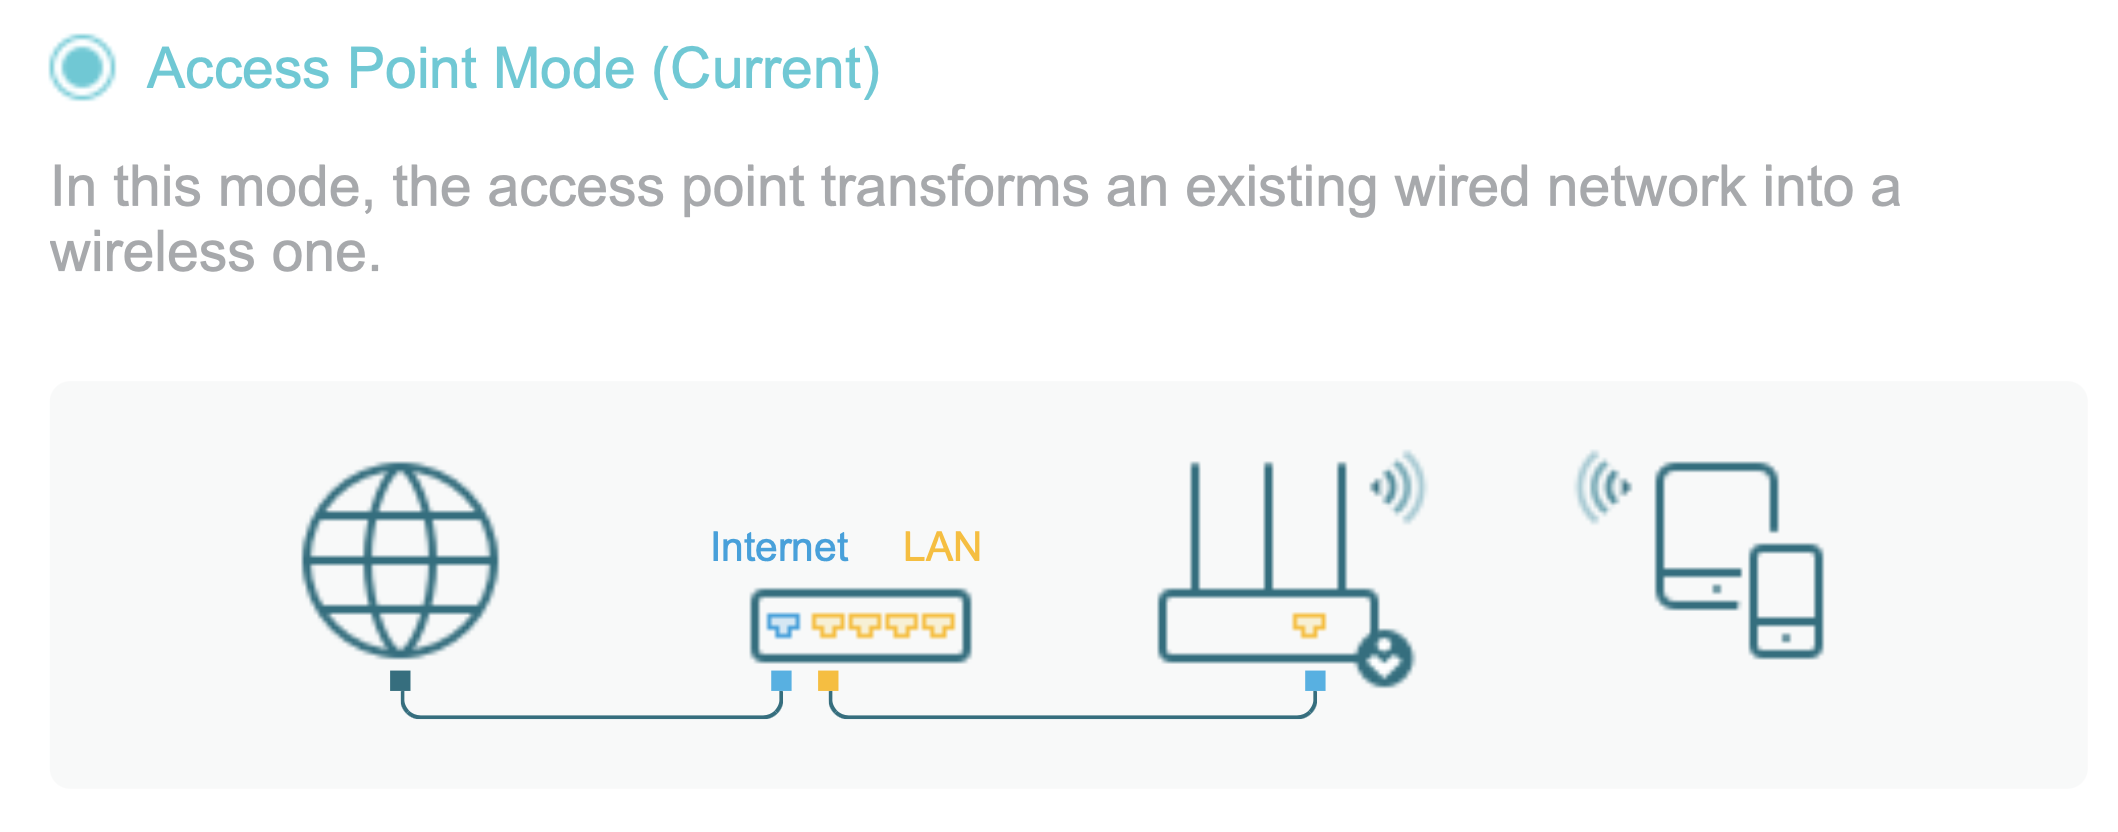
So the robots have no access to the Internet, unless you connect the Ethernet cable included in the box to another router that has Internet.
Very likely, you will not have the possibility of connecting by cable to another router (most centers do not allow that).
So, if you need the robots to have Internet access, then you need to configure the router included in Range Extender Mode:
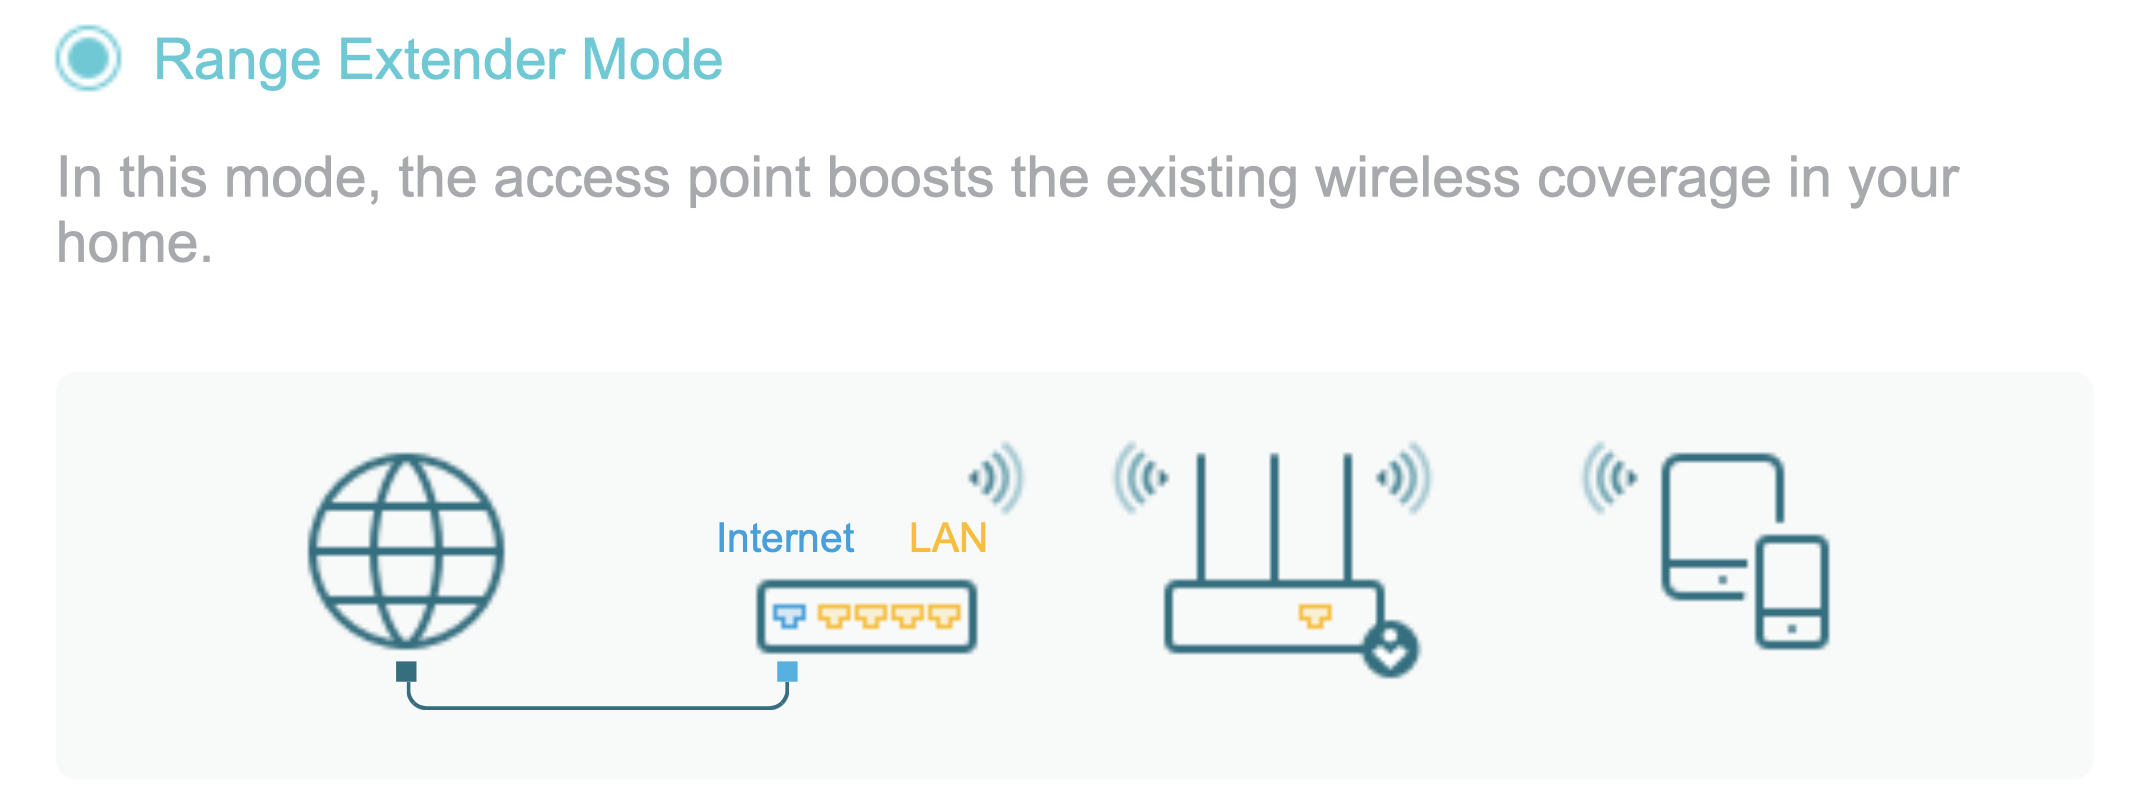
For that, you need to access the router config panel using a web browser connected to the wifi:
- Connect your computer to the
Botbox_Warehouse_Lab_5GEXTwifi - Open a browser and go to the router management panel visiting the address
https://192.168.8.1 - Log into the router management panel with the password
BotboxWarehouseLab0
Once inside the panel, take the following steps:
- Go to the
Systemoption on the top - Select the
Range Extender Mode
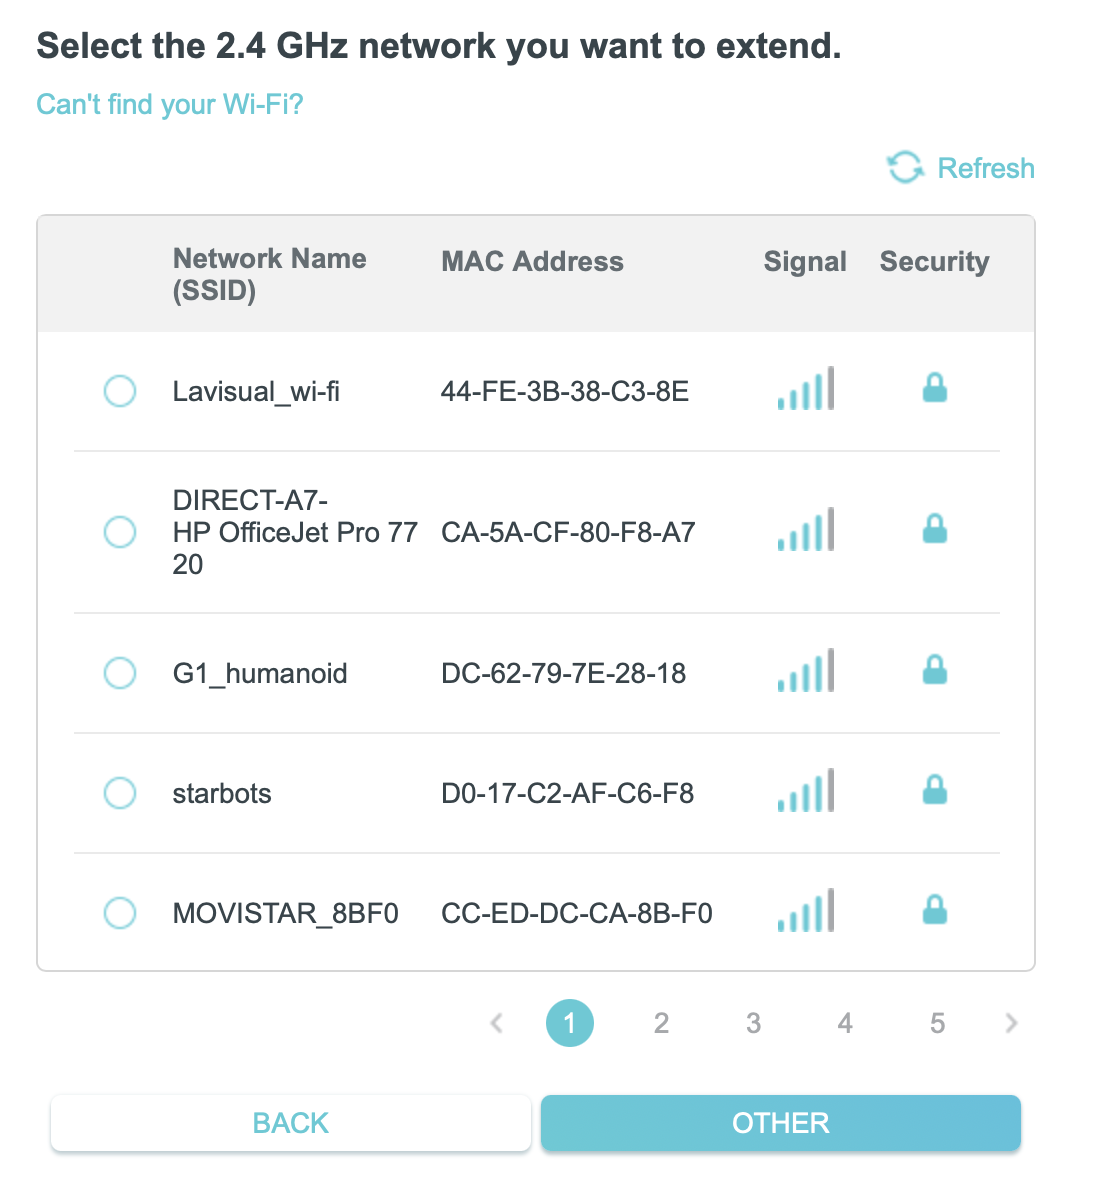
- Select the 2.4Ghz wifi you want to connect to (the one in your lab that provides Internet access), and configure appropriately (passwords and so on)
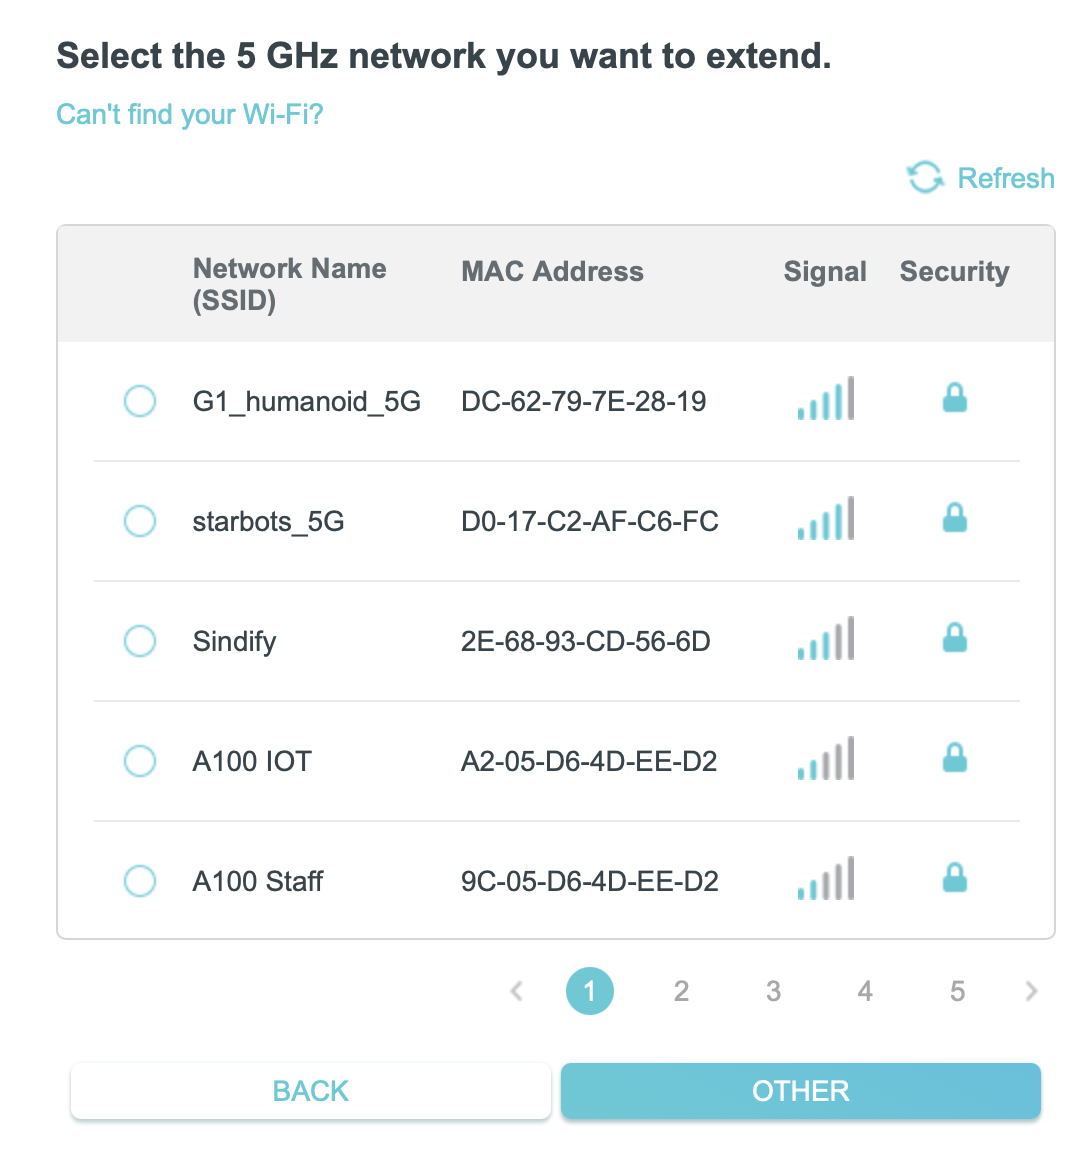
- Now select the 5Ghz wifi you want to connect to.
- Now configure the Botbox Warehouse Lab wifi with the following configuration. Please copy the exact data of the picture to avoid having to configure the Fastbot robots again
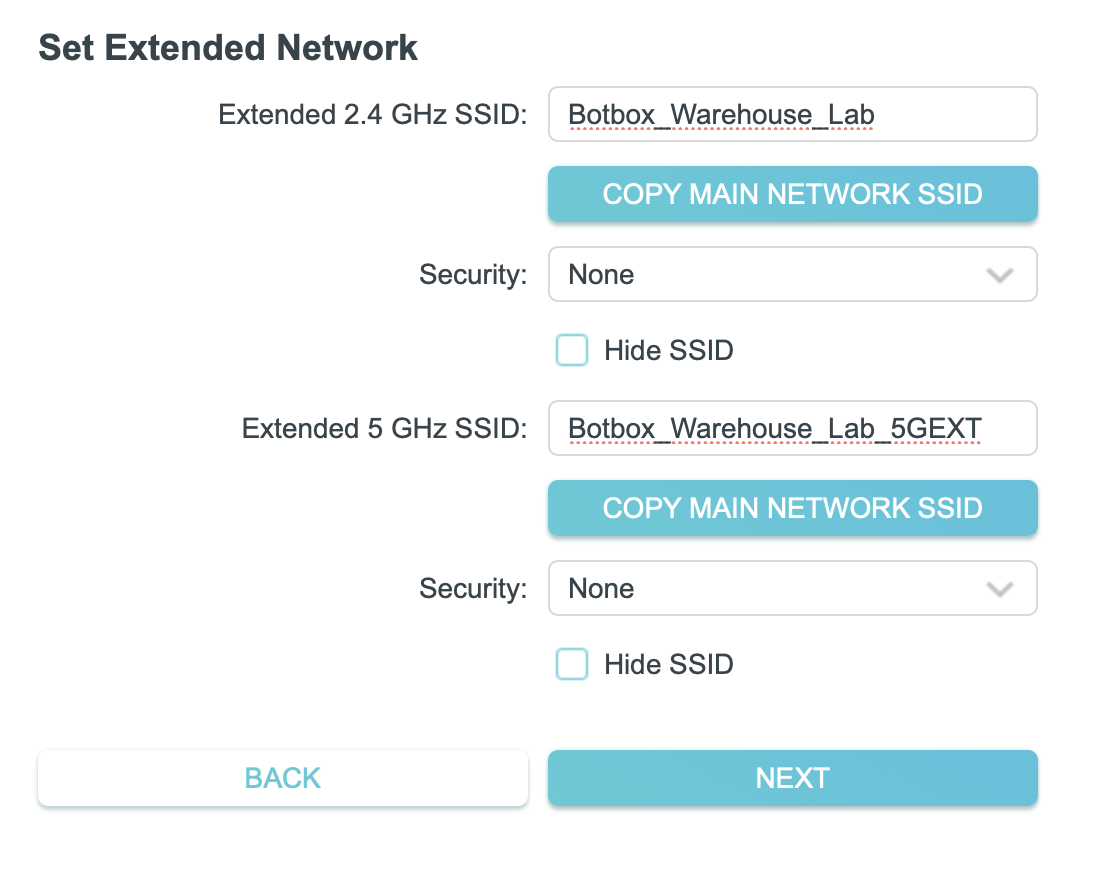
- Confirm the settings are correct
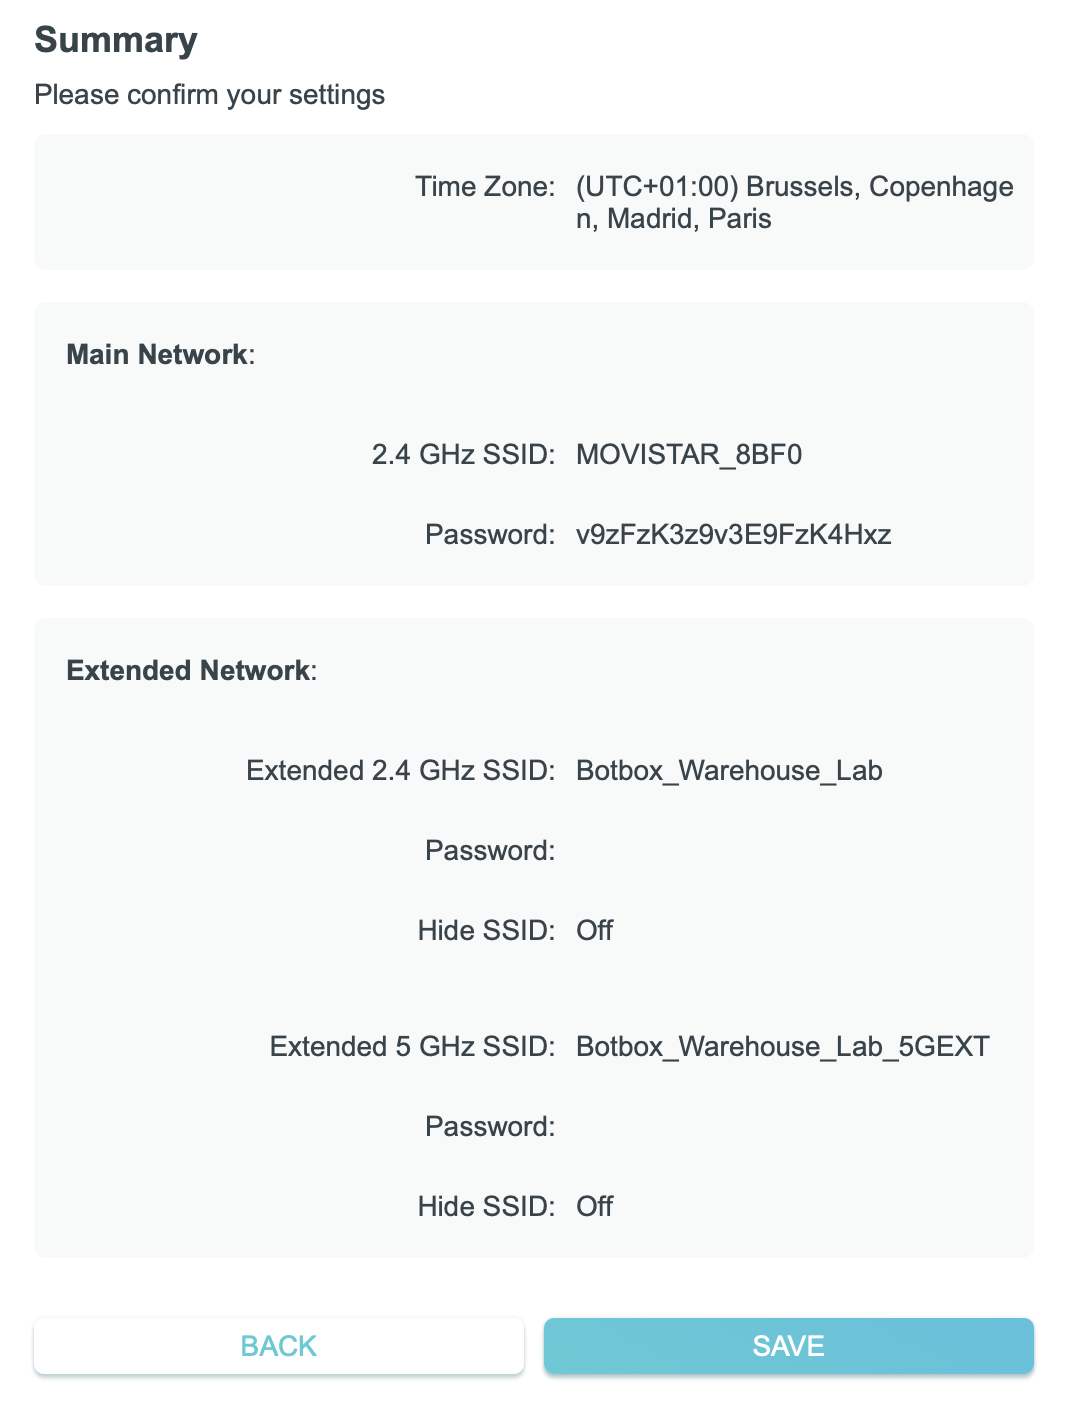
- Finished!
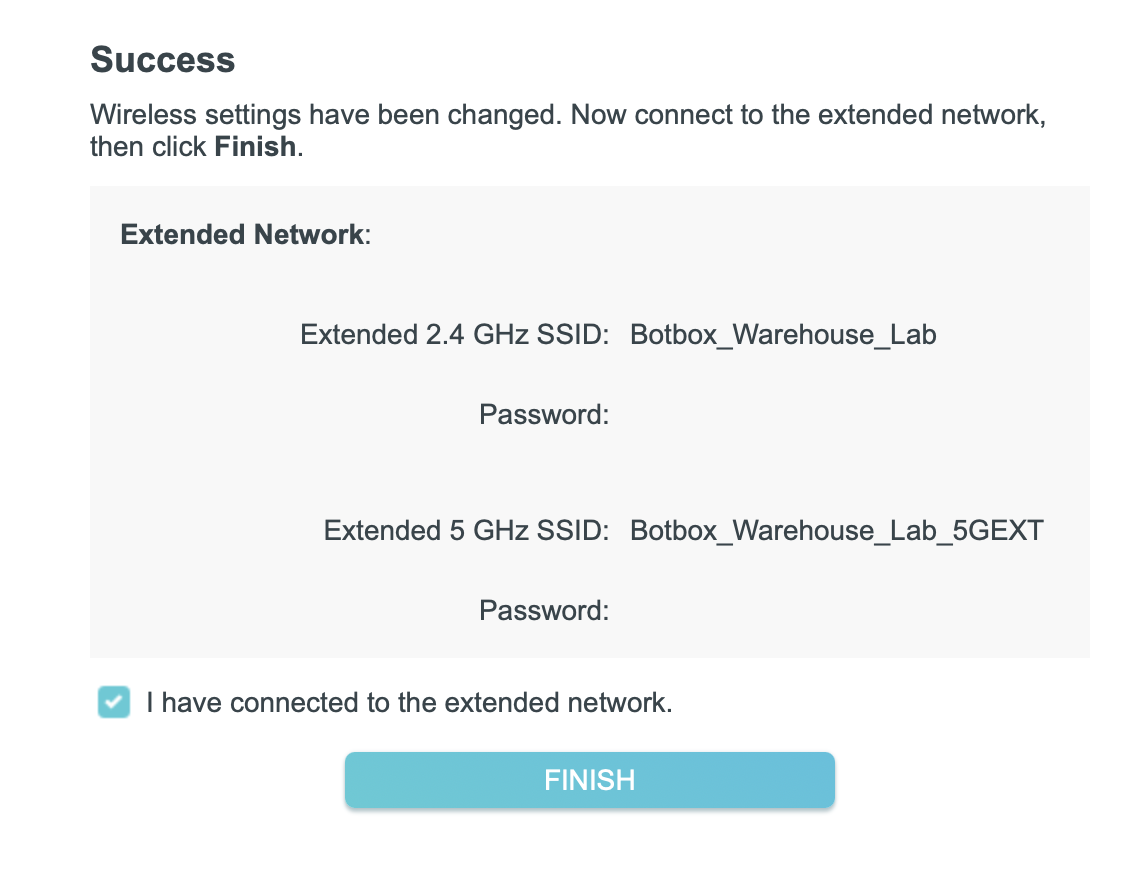
At this moment, your robots must be connected to the wifi and have also access to the Internet
EXTRA Steps: only for version 1.0 (no router version)
Set the wifi for each robot
Setting the wifi for the wheeled robots
The wheeled robots are called Fastbots.
To set the wifi of the Fastbots:
- Remove the SD from Fastbot-1. You can find it here:

IMPORTANT
Do not mix the SD cards. Each SD card is specifically configured for a given robot.
Steps for wifi connection:
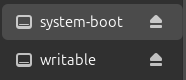
- Insert the SD card in your computer, and look for writable device that appears in your PC
- Access the SD at the folder
/writable/etc/netplan - Open the file
60-cloud-init-dhcp.yaml. You must have permissions to modify it. - Look for wifis and replace the
REPLACE_WITH_YOUR...with your WiFi network (SSID) and password.
# /etc/cloud/cloud.cfg.d/99-disable-network-config.cfg with the following:
# network: {config: disabled}
network:
    renderer: networkd
    version: 2
    wifis:
        wlan0:
            access-points:
                "REPLACE_WITH_YOUR_SSID":
                    password: "REPLACE_WITH_YOUR_PASSWORD"
            dhcp4: true
            nameservers:
                addresses:
                - 8.8.8.8
                - 1.1.1.1
                - 180.76.76.76 # Baidu
            optional: true
- Save the changes, remove the SD from your computer and insert it back into the robot
Repeat the same process with all the robots, including the robot arm and the conveyor belt
III. Switch the robots on
1. Switching the wheeled robots on
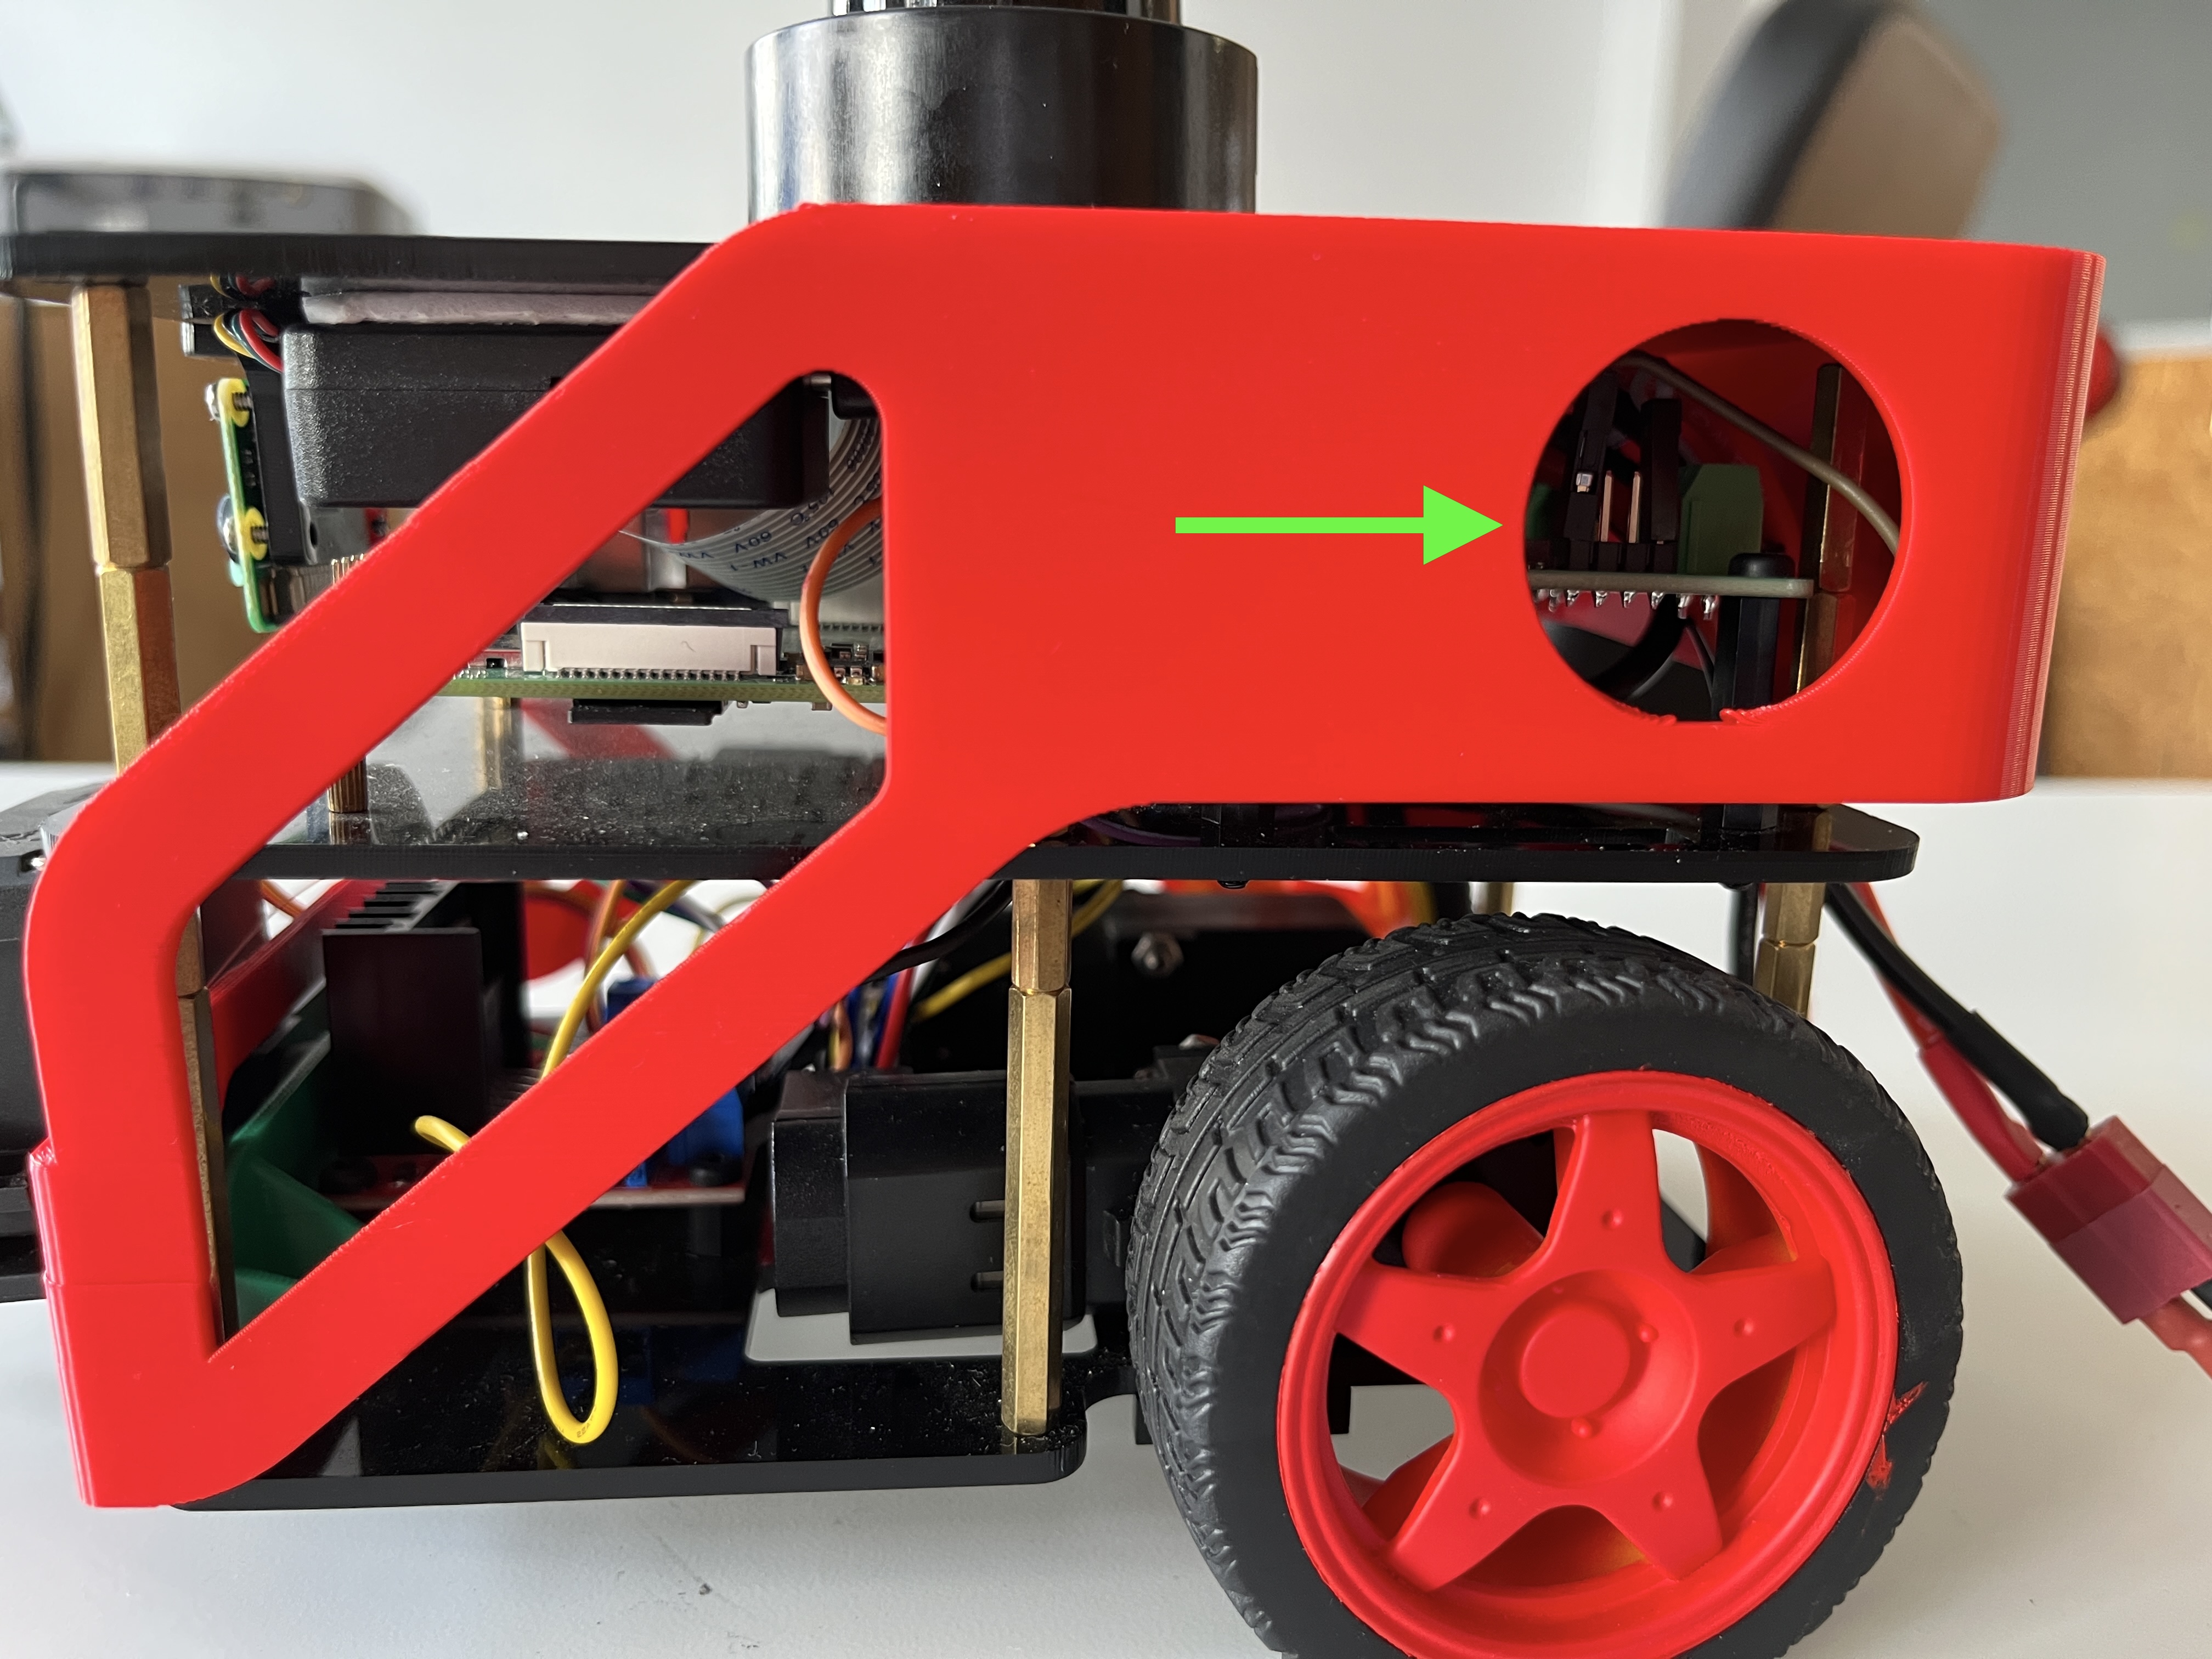
The switch to switch on the Fastbots is located here
- Once switch on, the robots should automatically connect to the wifi.
- Wait until they completely boot up. Once they boot up, you can do an
sshto them and check that everything is working - But first you need to know the robots' IP address
Get FastBots IP address
Now that the FastBots are connected to the WiFi, you need to know their IPs so you can access it.
- For this, download the app Network Scanner on your phone, available in Android and iOS.
- Connect your phone to the same wifi the Fastbots are connected.
- Use the Networks Scanner in the phone app to scan the WiFi network and look for a hostname with the name fastbot.
-
Write down the IP below it.
-
All Fastbots have the same
usernameandpassword
username: fastbot
password: theconstruct
ssh fastbot@\<the_robot_IP>
- Then check that all the topics are there
ros2 topic list
- Then check that you can move the robot
ros2 topic pub /fastbot_1/cmd_vel geometry_msgs/msg/Twist "{linear: {x: 0.2}, angular: {z: 0.15}}" -r 10
2. Switching the arm robot on (only for ULTIMATE version)
The robot arm has two elements that need to be switched on:
- The robot arm itself
- The Raspberry Pi that controls it
IMPORTANT
Make sure that the robot arm lies more or less flat (no joints turned over itself)
- Power the arm robot with its power supply provided
- Make sure that in the screen of the robot arm appears the message
Atom: ok- If it doesn't, press the right button, then press it again (that means
Exit ->) - If the screen still doesn't say
Atom: okthen check the myCobot 280 manual to debug the situation you are facing
- If it doesn't, press the right button, then press it again (that means
- Power the Raspbery Pi of the arm robot
- Connect the provided USB cable from the Raspberry to the arm
- Wait until the robot arm reaches the initial standing position automatically (may take a while)
- At this moment, the robot is ready to be used
Once they boot up, you can do an ssh to the arm Raspberry Pi and check that everything is working.
The password and username for the robot arm Raspberry Pi are:
username: theconstruct
password: theconstruct
ssh theconstruct@\<your_robot_IP>
- Then check that all the topics are there
ros2 topic list
- Then check that you can check that the robot is publishg the
joint states
ros2 topic echo /robotarm1/joint_states
3. Switching the conveyor belt on
The robot arm has two elements that need to be switched on:
- The conveyor belt itself
-
The Raspberry Pi that controls it
-
Power the conveyor belt with its power supply provided
- Power the Raspbery Pi of the conveyor belt
- Wait until the Raspberry Pi has booted
- At this moment, the conveyor is ready to be used
Once they boot up, you can do an ssh to the conveyor Raspberry Pi and check that everything is working.
The password and username for the robot arm Raspberry Pi are:
username: theconstruct
password: theconstruct
ssh theconstruct@\<your_robot_IP>
- Then check that all the topics are there
ros2 topic list
- Then activate/deactivate the conveyor calling its service`
ros2 service send_goal
The conveyor belt should start moving.
To stop the conveyor belt from moving just send another goal with oposite value
IV. How to change the ROS_DOMAIN_ID
In case the Botbox Lab is interferring with other robots and labs that you may have, you can set the robots in a different domain and prevent the interference.
To change the ROS_DOMAIN_ID, you will need to change that in the docker configuration files of the robots. For that, you need to access the SD card of the robots:
- Remove the SD card from the robot and insert it into your computer
- Go to the writeable device mounted
- Go to the file
~/git-repo/fastbot/docker/docker-compose.yamland edit it -
Add a line below the line
- ROBOT_NAME=fastbot_1
That line you need to add is:
- ROS_DOMAIN_ID=<YOUR DOMAIN ID>
substituing the <YOUR DOMAIN ID> by the number of the domain you want your robots to work on.
The file should look like this:
...
environment:
      - ROBOT_NAME=fastbot_1
      - ROS_DOMAIN_ID=<YOUR DOMAIN ID> # <- Add this line with your domain ID
      # Uncomment environment variables below if robot is registered with The Construct's Real Robot Service
      #- RMW_IMPLEMENTATION=rmw_cyclonedds_cpp
      #- CYCLONEDDS_URI=/var/lib/theconstruct.rrl/cyclonedds_husarnet.xml
    group_add:
...
- Repeat the process with the other robots of the lab